Shading creates depth, dimension, and realism in your drawings. Whether you’re wielding a pencil or a pen, mastering shading techniques unlocks the power to transform flat shapes into captivating three-dimensional forms. Explore some essential shading methods for both pencil and ink artists in this article, and try some new techniques in your next piece.
Pencil Shading Techniques
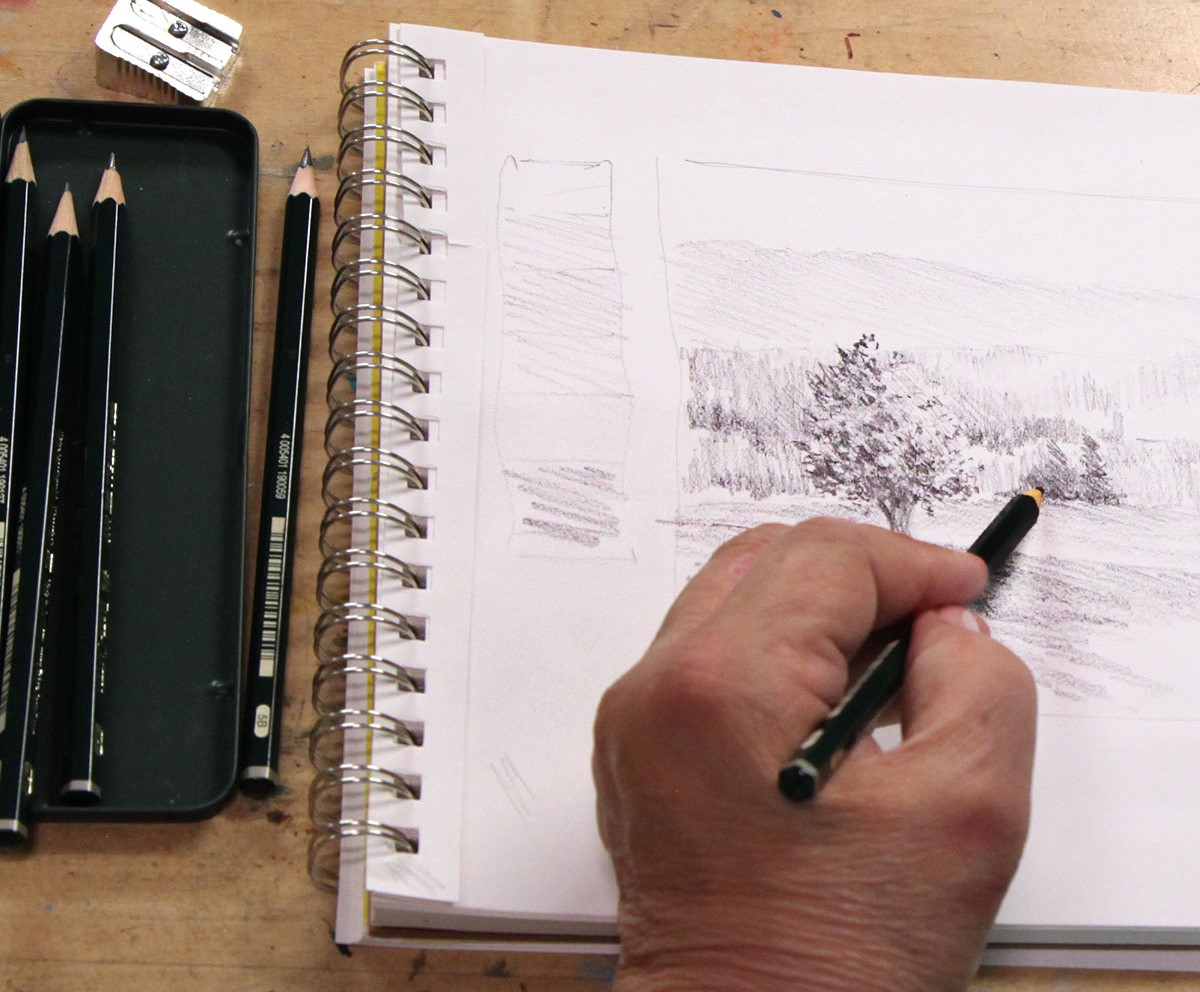
Hatching: This classic technique involves creating parallel lines to create shadows. The closer the lines are spaced, the darker the value. Varying line weight and direction can add depth and texture.
Cross-Hatching: Take hatching a step further by layering lines at different angles. This creates a richer and smoother gradation of value.
Stippling: This method employs tiny dots to build up value. It creates a soft and textured effect.
Scumbling: Similar to stippling, scumbling uses short, random strokes to create a light and textured shading effect. It’s a good way to soften harsh lines or create a sense of atmosphere.
Shading with Pressure: This technique, primarily for softer pencils, utilizes varying pressure to control the darkness of your mark. Lighter pressure creates a soft gradation, while pressing harder creates darker tones.
Ink Shading Techniques
While achieving smooth transitions can be trickier with ink, here are a few effective methods to create shadows and depth.
Linework Variation: Vary the density and thickness of your lines to create shadows. Thicker, closer lines create darker areas, while thinner, spaced-out lines create lighter areas.
Cross-Hatching with Ink: Similar to pencil, cross-hatching with ink creates darker tones. Experiment with different line directions and densities for a dynamic effect.
Dry Brush Technique: This method involves applying ink with a nearly dry brush, creating a textured, stippled effect.
Layering Washes: For a more nuanced approach, dilute your ink to create washes. Layer these washes progressively to build up darker values, creating a subtle gradation of tone.
Tips for Effective Shading
Start Light: Always begin with lighter pressure or diluted ink. You can always add more layers to darken an area, but it’s difficult to lighten areas already heavy with pencil or ink.
Follow the Form: Consider the shape of your subject as you shade. Lines and strokes should follow the contours to create a sense of volume.
Blending: For pencil drawings, use a blending tool to soften harsh lines and create smoother transitions.
Experiment and Practice: The key to mastering shading is experimentation. Try different techniques and materials on scrap paper to find what works best for you.
Shading is a powerful tool that elevates your artwork from flat to fabulous. Whether you favor the forgiving nature of pencil or the bold statement of ink, mastering these shading techniques will unlock a world of creative possibilities. So, grab your favorite drawing tool and get shading!
Very handy article
I practice by sketching Michelangelo's Piata. there is so much depth to it. when I haven't picked up a pencil in a long time that is always the first thing I practice.
Would like examples of each.
It would be nice to see these techniques on a video. Thank you